Forget Star Wars Jedi: Survivor — jump into Jedi Knight II in VR for just $3.49
Show Cal Kestis how to really swing a lightsaber

What you need to know
- Developer Team Beef created a VR version of the classic Star Wars Jedi Knight II: Jedi Outcast for the Meta Quest platform.
- This download is free, however, you'll need to own a copy of Jedi Knight II to use it.
- Jedi Knight II is on sale on Steam for $3.49 until May 4, but you'll need to sideload the game onto the Quest to use it.
Looking to play a VR Star Wars game that's a bit beefier than games like Vader Immortal or Tales From the Galaxy's Edge? Developer Team Beef has your back, and thanks to the Star Wars sale on Steam, you can get the classic Jedi Knight II: Jedi Outcast on your Quest today for just $3.49 until May 4.
As you might imagine, there's a small caveat to the process: you'll have to sideload Jedi Knight II onto your Quest to play it in VR. If you haven't done it yet, here's how to install SideQuest on your headset. This game runs completely on Quest 2 or Quest Pro hardware, so you don't need a PC to play, but you'll need one to get it set up.
Star Wars Jedi Knight II: Jedi Outcast originally came out on the PC in 2002 to rave reviews and amassed quite a following. The third-person game uses id Tech 3 — that's the engine that powered Quake 3 — so it doesn't look cutting-edge like Jedi: Survivor, but it runs extremely well on Quest hardware and looks almost as good as some of the best Quest games.
The VR version moves into first person and adds in some impressive VR-centric UI and controls, including full motion support — so you hold a gun or a lightsaber exactly like you would expect in VR — and can interact with the environment by physically pressing buttons with your fingers instead of tapping a button on your controller. Even the weapon selection menu has been redesigned for VR by Team Beef.
How to install Jedi Knight II on Quest
Once you have SideQuest installed on your headset, open it up and follow these steps to get JKXR — that's the VR version of Jedi Knight II — installed on your Quest.
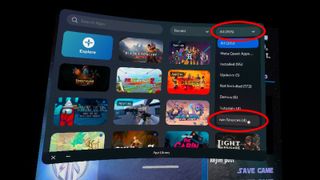
1. Open the app drawer on the Quest by pressing the home button on your right controller and tapping the icon that looks like a grid of dots.
2. Filter apps to unknown sources by selecting the drop-down menu on the top-right of the app drawer.
Be an expert in 5 minutes
Get the latest news from Android Central, your trusted companion in the world of Android
3. Select SideQuest from the menu.
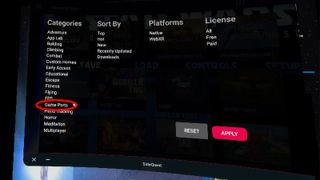
4. In SideQuest, click the filter button on the top right. It looks like an upside-down pyramid.
5. In the menu, select game ports, then select apply.
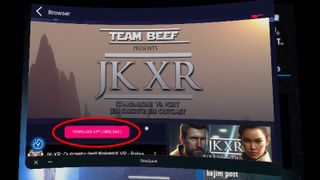
6. Scroll down and select JKXR.
7. Select Download App (Sideload).
8. Once it's installed, open your app drawer again and select JKXR from the list in unknown sources.
9. Grant JKXR permission to write to the Quest's storage. JKXR will create the directories it needs and close.
10. Take off your headset and head to your PC.
Now to bring the game over
Once you've got that done, open up Steam on your PC and buy Jedi Knight II. Download the game and follow these steps to get it on your Quest:
1. Connect your Quest to your PC via a USB cable.
2. On your Quest, select allow to share file access with your PC.
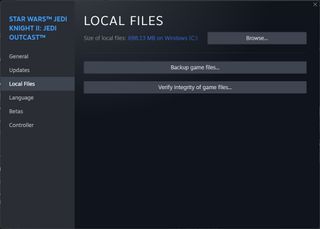
3. On your PC, open Steam, then right-click on the game in Steam and select properties.
4. Select local files on the list on the left.
5. Select browse to open a File Explorer window in the directory.
6. In File Explorer, open the GameData folder, then open the base folder.
7. Highlight assets0.pk3, assets1.pk3, assets2.pk3, and assets5.pk3, right-click and select copy.
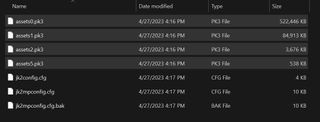
8. In File Explorer, navigate to the Quest 2. It'll be located under This PC in the left-hand menu.
9. Open the JKXR folder, then the JK2 folder, then the base folder.
10. Paste the files you copied above into this directory.
11. Once this is done, unplug your Quest, then launch JKXR on your Quest using the previous steps.
If you like this game on the Quest, check out some of Team Beef's ports on SideQuest including Half-Life, Doom, Doom 3, Quake, and more.
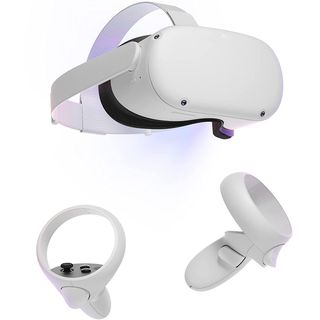
Play classic PC games in VR with a Quest 2 and SideQuest. It's a whole new perspective on some of the best games ever.

